Make Full Image Of Broken, RAW, Infected or Encrypted Hard Drive With Free Tools
DISCLAIMER: These examples use techniques that I actually employ in the real world to deal with real problems. They might be wrong or dangerous. They might be inefficient. If you try them yourself, it might cause damage or irreparable loss. I take no responsibility for anything you do based on my examples or the information that I provide here.
Making a complete image of a hard drive is often the first step in a data recovery, repair or basic forensic investigation of a hard drive.
These instructions are written for the layperson who wishes to take a shot at making an image on their own. If there is damage, understand that there is a risk of making the data more difficult or even impossible to recover and you should send critical or very important hard drives to a professional lab for recovery.
A complete image gets all the data including encrypted files or filesystems, remnants of deleted files, ‘ransomware infected’ drives and damaged drives where the damage is only some ‘bad sectors’ (hard drives with physically damaged electromechanical parts should be sent to a lab for imaging). How many ‘bad sectors’ is too many for this technique? That’s a judgement call for you to make yourself. For me, if it is less than 100 then I’m usually pretty comfortable making a ddrescue image if I don’t see any other signs of damage or increasing deterioration.
You can determine the number of ‘bad sectors’ and other damage by checking the drive’s S.M.A.R.T. data as I explain here in the section titled…
Accessing and Assessing a Hard Drive’s S.M.A.R.T. Data to Determine if There is Physical Damage
https://html5.litten.com/updated-how-to-fix-external-disk-drive-suddenly-became-raw/
After you make the image, the original drive can be safely packaged away in case a solution to its problem is found or you discover that it needs a more in depth physical recovery that must be done in a clean room environment using specialized tools.
THE ADVANTAGE BEING THAT YOU CAN TAKE CHANCES WITH THE IMAGE AND NOT WORRY IF YOUR ATTEMPTS FAIL
Recovery and forensics work can be done using software tools on the image file. I usually make a master copy of the image file that I put aside and work with copies of the image file but most people don’t feel the need to be that cautious. This can take up a lot of space on hard drives but they are inexpensive compared to the costs of sending the drive to a professional lab.
GNU ddrescue is a great tool for making a complete image since it is able to copy the drive bit by bit and skip any area that gives it the slightest trouble while remembering where that area was so that it can be revisited after all the undamaged areas are copied. This is important since trying to read an area that is damaged or that the heads are having trouble reaching can excacerbate any electrical or mechanical problems causing the damaged areas to grow into areas that have not been copied yet. Another great feature of GNU ddrescue is its ability to remember what it has done (using its log file aka map file) so if there is a power interruption or you need to stop the imaging operation, you can easily start again at a later time resuming from where it last left off. This also allows you to retry accessing damaged areas multiple times which, surprisingly, can eventually get at least some of the damaged data in many cases.
Here is what you need and an outline of what we will do followed by an actual example of me doing this…
You need …
A. computer or laptop that you can use to connect both the drive to be imaged and the drive that will hold the image file.
B. drive to be imaged
C. drive to copy the image file and ddrescue log file to. It must have a partition with enough free space to hold the entire drive that you are imaging plus about 5%. So if you are imaging a typical 500GB laptop drive you need at least 525GB free space on the drive that you are sending the image file to.
D. USB thumb drive formatted with an empty FAT32 partition and a capacity of at least 500MB
E. tuxboot software (which will download the latest version of Clonezilla and make your USB thumb drive bootable with it)
http://tuxboot.org/installation/
PROCEDURE
1. Create USB thumb drive with Tuxboot to make it boot Clonezilla http://clonezilla.org/
2. Use USB thumb drive to boot the computer/laptop that has both the drive to be imaged and the drive that will store the image connected to it.
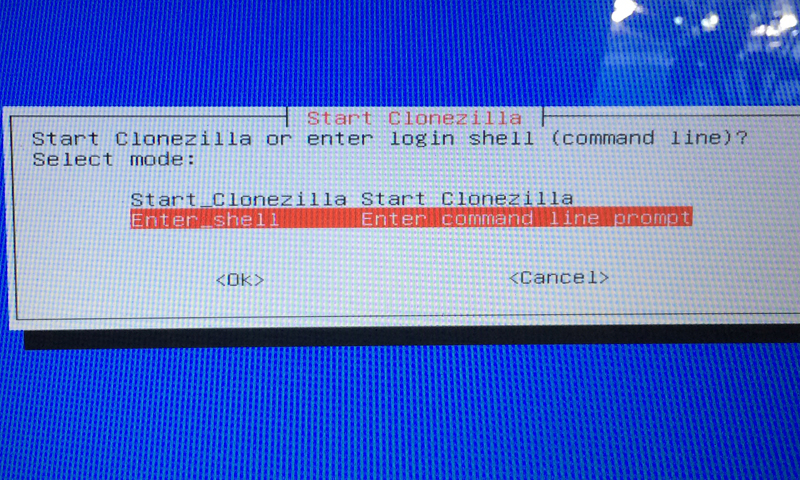
3. Choose to use the Clonezilla command line interface.
4. Run sudo fdisk -l to identify which drive is which.
5. Mount the partition we will be storing the drive image on
6. Run ddrescue command
7. Wait until finished and note if error count is greater than 0. If not, good. If it is then consider retrying or determine reasons for the error count such as checking the S.M.A.R.T attributes of the drive for physical damage in the form of bad sectors.
All set?
Here we go…
STEP 1
Create USB thumb drive with Tuxboot that boots Clonezilla
http://tuxboot.org/installation/
The USB thumb drive must be formatted FAT32 and empty with a capacity of at least 500MB
For Windows, download
https://osdn.net/projects/tuxboot/downloads/64880/tuxboot-0.6.exe/
Run it
http://tuxboot.org/screenshots/
Choose Clonezilla Live Stable
Make sure that the drive it will write to is the same drive letter as your USB thumb drive.
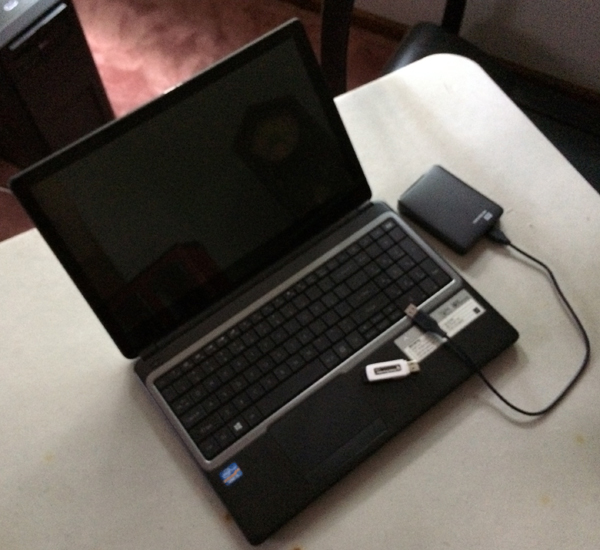
I’m using a 8GB thumb drive, a 2TB WD Elements external hard drive to store my image and a Gateway laptop containing the drive that I want to make an image of.
STEP 2
Use the USB thumb drive you just made to boot the computer/laptop that has both the drive to be imaged and the drive that will store the image connected to it.
Connect..
the USB thumb drive
the drive to be imaged (mine is the 500GB drive already in my laptop)
the drive that will store the image (we are using a drive with an NTFS partition in our example as that is the most common format a layperson will have on their drive)
You may need to turn off Secure Boot in your BIOS and you will need to know how to get it to boot from the USB key.
Search online or look at the computer/laptop manual for instructions for your manufacturer/model number.
(Also, want to note that if the computer that you are using normally boots to Windows 10 then you may need to go into SETTINGS in Windows 10 and choose to reboot using the ADVANCED STARTUP setting in the UPDATE & SECURITY | RECOVERY menu in order to be able to access the BIOS while it is starting)
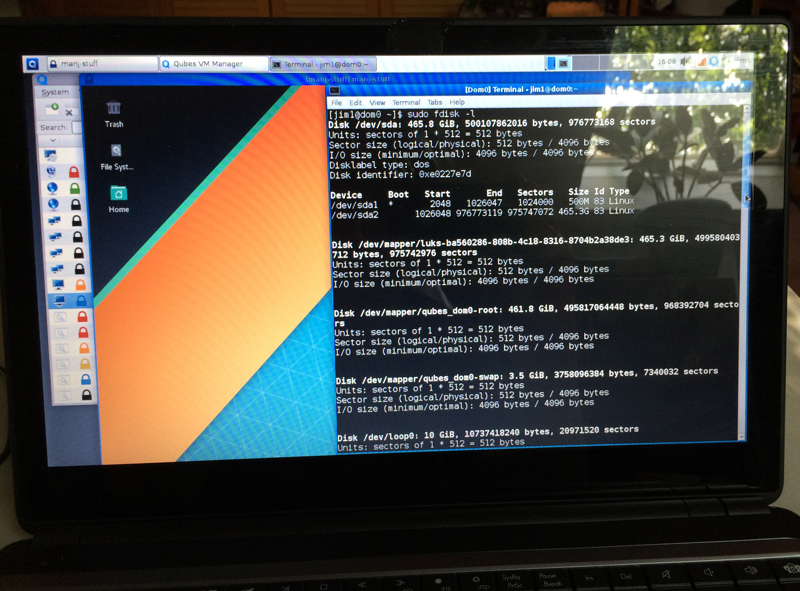
I’m using a Gateway NV570P10u laptop which has Qubes OS on it and here you can see the 500GB drive that we are going to image listed.
In my case I go into the BIOS by powering on the laptop and pressing the F2 key then in the BOOT menu of the BIOS settings I disable SECURE BOOT.
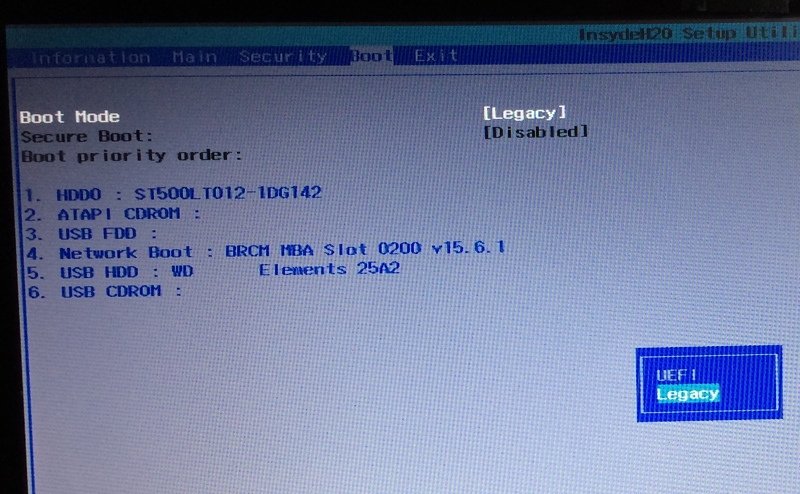
In order to boot from the USB key, I save my BIOS changes and reboot. While it is starting I press the F12 key to get the boot device selection menu and select my USB thumb drive.

The computer now boots into Clonezilla
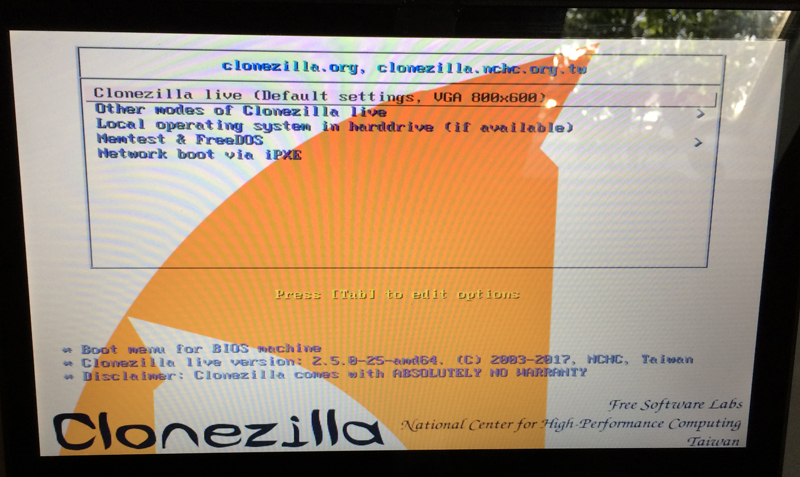
Choose defaults…
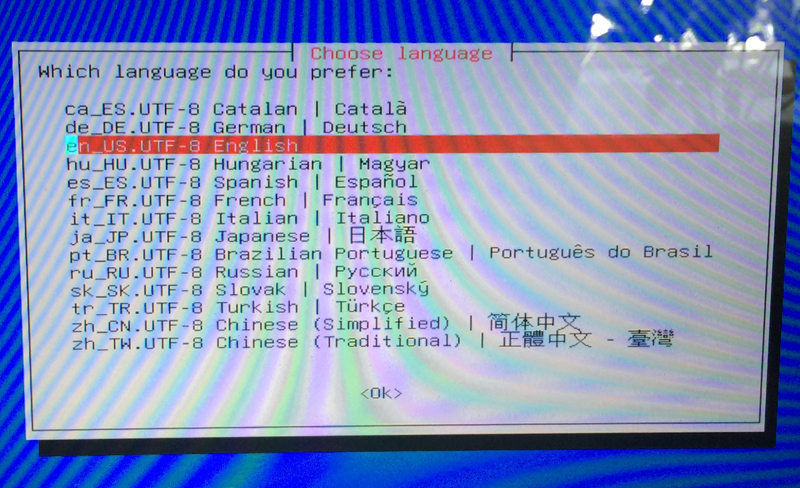
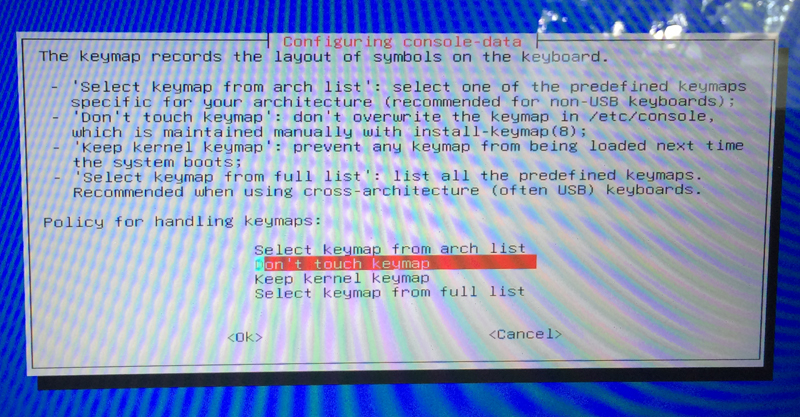
STEP 3
Choose Clonezilla command line interface.
STEP 4
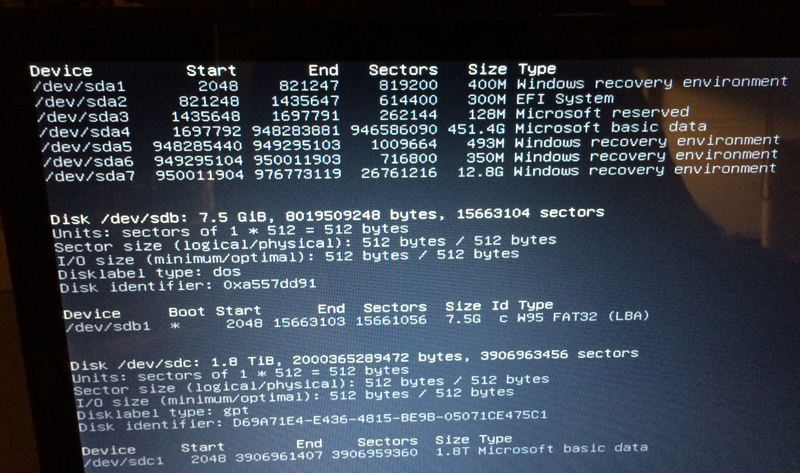
Run sudo fdisk -l to identify which drive is which.
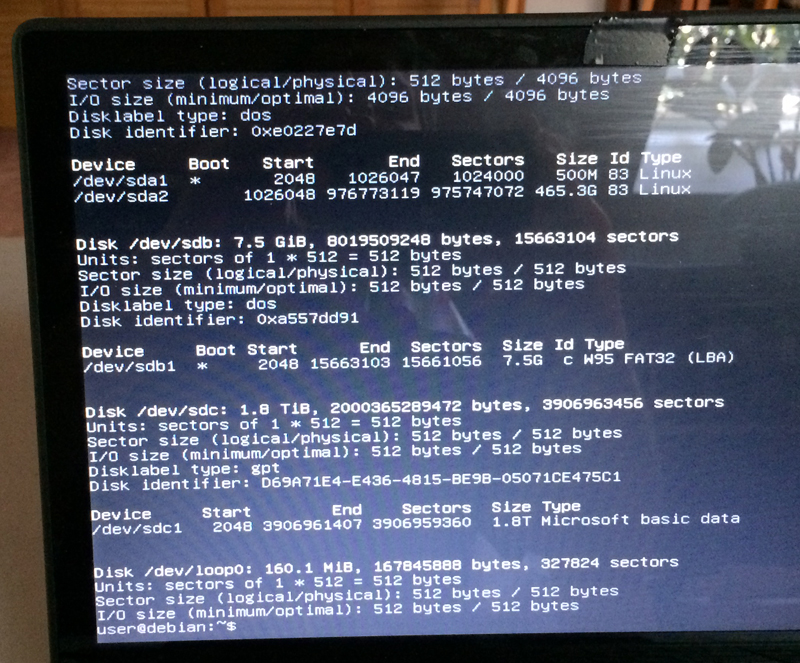
You can see in the picture above that the partition on my 2TB external drive is /dev/sdc1. That is where I want to write my image file so I need to mount it.
STEP 5
Mount the partition we will be storing the drive image on (we are assuming that you will be using an NTFS partition since that is what is standard on most external drives that you will buy for this purpose)
Type…
sudo mkdir /home/user/imgdrive
sudo ntfs-3g /dev/sdc1 /home/user/imgdrive

Now when I look at the contents of the /home/user/imgdrive directory with the ls command, I see the contents of my 2TB drive so we are good to go.
STEP 6
Run ddrescue command
sudo ddrescue -r 3 /dev/sda /home/user/imgdrive/image.dd /home/user/imgdrive/rescuelog.log

This runs ddrescue
-r 3 tells ddrescue to retry rescuing each bad sector 3 times before giving up on it.
/dev/sda is the drive that we are making an image of.
/home/user/imgdrive/image.dd is the image file that we want to make of the drive.
/home/user/imgdrive/rescuelog.log is where we want to save our logfile (now called a map file but nothing else has changed) which is in the root of our external 2TB drive that we connected to the laptop.
http://www.gnu.org/software/ddrescue/manual/ddrescue_manual.html

STEP 7
For my example, the process took about 2 hours to complete to complete with 0 errors.
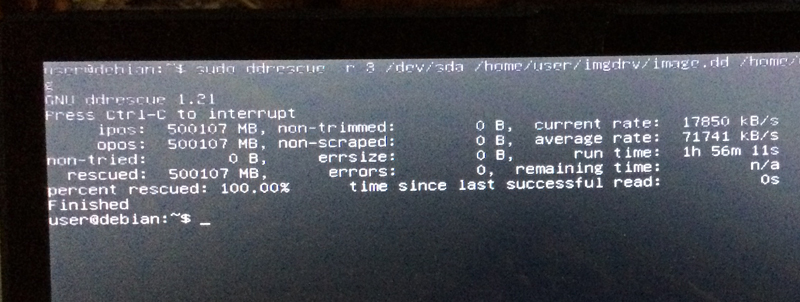
When done and satisfied, you can simply turn the power off Or type exit and hit enter, go another step into the Clonezilla wizard and then choose CANCEL which brings up a menu that lets you power down.
Since we made a log file with ddrescue, you can run the same ddrescue command again anytime and it will continue on or try the retry 3 more times. You lose no progress by powering down.
So, wait until it is finished and note if error count is greater than 0. If not, excellent. If it is greater than 0 then you can run the same command again to retry the error sections 3 more times or resign yourself to the fact that you got all that you could and attempt to repair the image with a tool like TestDisk. If the image is a Windows boot drive that has stopped working, try using ddrescue to put the image on a new drive like I do below with the –force switch. I have had instances where doing so caused Windows to be able to repair the errors automatically since the new drive does not have the problems (usually bad sectors) that the old drive had. Also, check the S.M.A.R.T attributes of the drive for physical damage in the form of bad sectors to see if that is the cause of the errors.
I explain how to do that in the section titled…
Accessing and Assessing a Hard Drive’s S.M.A.R.T. Data to Determine if There is Physical Damage
https://html5.litten.com/updated-how-to-fix-external-disk-drive-suddenly-became-raw/
If all you wanted to do was make an image, you’re done. You can skip down to the section titled…
SO WHAT CAN YOU DO WITH THE IMAGE
EXTRA EXAMPLE, RESTORING IMAGE TO A PHYSICAL DRIVE
The image that I made in this example is of my Qubes OS drive but earlier this laptop was running Windows 10 on that same drive which I imaged as a practice run before writing this post to make sure that I had the directions as concise and correct as possible.
Then I did a deep format of the drive and played with getting Qubes OS to work on it. This completely removed Windows 10 from this laptop as well as the factory restore partition from Gateway.
Now let’s take that Windows 10 image that was originally on the laptop and use ddrescue to put it back and see if it works.
WARNING! WARNING! WARNING!
This overwrites the data on a drive. The best way to make sure that you do not overwrite the wrong drive is to physically disconnect all drives from the computer except for…
1. The drive containing the image file
2. The drive that you want to completely overwrite with the image
3. The thumb drive you need for booting into Clonezilla
This way the worst mistake you can make is accidentally overwriting the thumb drive and that is easy to make another one. Overwriting your family photos or financial records is not so easy to recover from 🙂
I already have a copy of the Windows 10 image that I made on the 2TB drive in
/dev/images/gatewin10img.dd
Like before, we boot into Clonezilla, mount our drive and our image will be located at…
/home/user/imgdrive/dev/images/gatewin10img.dd
We’ll need to use the –force option (that is 2 dashes in case you can’t see it) with ddrescue to let it know we understand that this will overwrite the data on the drive.
sudo ddrescue –force /home/user/imgdrive/dev/images/gatewin10img.dd /dev/sda

The process took about 2 hours to complete with 0 errors.
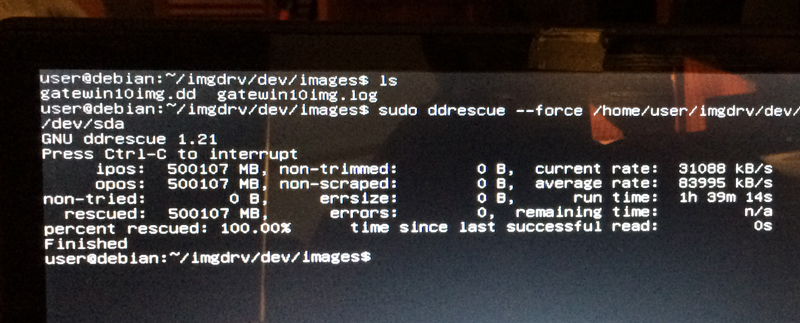
And all my partitions seem to be there now…
I needed to enable SECURE BOOT in the BIOS again before booting.
Et voilà!
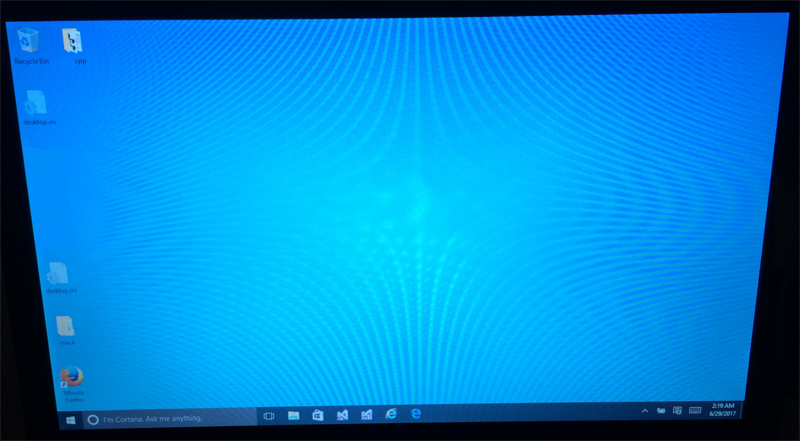
It boots into Windows 10 exactly like it did before I imaged it and wiped it out.
SO WHAT CAN YOU DO WITH THE IMAGE
Often, I use images to recover data from failing drives or drives with severely corrupted file systems. Tools like TestDisk and PhotoRec allow you to work directly with images and there are other tools that allow you to examine the the images for forensic data such as deleted files or hidden file system data files like $MFT.
Here are some examples from previous posts where I used GNU ddrescue to recover data…
Windows ‘File Recovery’ series : Part 4 Recover Files From a Bad Hard Drive
Windows ‘File Recovery’ series : Part 4 Recover Files From a Bad Hard Drive
How To Fix: Recover Data From a Scratched or Damaged CD or DVD
How To Fix: Recover Data From a Scratched or Damaged CD or DVD
It can also be used to isolate and sandbox potentially dangerous infected drives to examine the infection or try to decrypt ransomware without risking loss of the data if you make a mistake (since you have the original drive and another copy of the original image stored separately).
Images can also be easily mounted in many operating systems and accessed as if they were actual hard drives.
Once you have successfully made an image, you’ve made a safety net that allows you to take risks with the data while maintaining options and increasing your likelihood for success.
CONCLUSION
The purpose of this post is to provide directions for a safe, easy and free way for an average computer user to make a high quality complete image of a drive.
If you have any comments about how I can make this better, please let me know. If you have any questions or run into problems with this process, feel free to comment or contact me.
Excellent piece on an important topical matter- data recovery. Clearly composed and thought-out for the average computer user with enough technical information to
1) provide them the opportunity to learn more; and
2) satisfy advanced users with canonical thinking
Thanks
Dear James Litten,
Before I go on I would like to thank you for the great job you did.
I have downloaded 2 posts up to now.
But before I start (and maybe forget) again thank you.
Why; I recognize the way how you do this, and number of replies tells me I have to follow you approach.
Best Regards,
Han Wanders from the Netherlands